Sunday, March 23, 2014

More info on yogurt, awesome waffles, my doctor and tests this month

I have made more yogurt since I posted about making the last batch.  I also made some almond milk yogurt last week and I have to tell you that stuff sucked big time.  I had read a blog called fairytalecomesalive that used almond milk and they had a picture of yogurt that resembled kefir...  I thought I will make it and use it in blender drinks!  What I didn't read the part that said I needed to make my own almond milk!  I used Blue Diamond Almond Milk from the store...great idea but...it didn't set up right and had the smell of spoiled eggs and I bet would have tasted nasty.  There was a watery whey on top, chunky clabbered almond milk bits in the middle then the arrowroot starch was a gelatinous mess at the bottom.  Another site I visited said you had to use home made almond milk cause the processed milk lacked the proteins necessary for yogurt.  Lexie's Kitchen has all sorts of help fun information about various alternative diet cooking.  I am going to try again cause it looks really easy to make your own.  I sort of paraphrased the almond milk recipe from fairytalescomealive! so go there or Lexie's kitchen to get an exact recipe. 

Homemade Almond Milk

1 c almonds
4 c water

Soak almonds overnight in water.  Drain and put in blender add 4 cups of water and blend till chopped fine.  (I don't have a Vitamix blender so I will have to go to my daughters and use hers when I make my milk.)  One site I read said a regular blender will grind fairly coarse and you really need the Vitamix style of processor.
Put several layers of cheese cloth in a bowl or use a kitchen towel in the bowl securing it around the outside of the bowl.  Pour the blended almond milk through the towel into the bowl.  Then gather up the towel and squeeze the milk out until all you have left is almond pulp.  Save this pulp to use in other recipes.

The second batch of milk yogurt was made using boxed UHT milk and the culture from the last batch of yogurt I made.  It came out tasty but a little thin.  I think I am going to try whole milk from the store and add some of the capsules that I read about next week.

Found a great waffle recipe that Chuck said he loved and thought was the best waffles ever on the Daily Dietribe blog.
  Gluten-Free, Vegan Pancake & Waffle Recipe (Please scroll down and read the tips before making these!)

1 1/4 cups or 158 grams flour (or mix of flours)***
1/2 cup or 86 grams starch
2 teaspoons baking powder
1/2 teaspoon sea salt
2 tablespoons granulated sugar

1/4 cup unsweetened applesauce
2 tablespoons oil
1/2 to 1 3/4 cups liquid

*** I know that cups and grams are different for each flour. HOWEVER, I tested this recipe out with EACH FLOUR with cups AND grams. Whether you measure your flours by cups or the gram measurements given, your pancakes/waffles will work. If you use almond flour, you'll only need about 1/2 cup of liquid. If you use a thick liquid like full-fat coconut milk, you'll need more (up to 1 3/4 cups). Otherwise, you'll need about 1 cup of liquid (milk, water, juice, etc.) regardless of the flour. 

1. Whisk together your dry ingredients.
2. Whisk together the applesauce, oil, and 1/2 cup of liquid. Pour the dry ingredients into the wet, and stir. Add more liquid slowly (I do it by the tablespoon so as not to pour too much) until you've reached the consistency of a thick pancake batter. Always start with less liquid and test the batter on one pancake or waffle first. If it's too thick, you can add more liquid, but you can't take liquid away once you've added it!

  • To make waffles, make sure to oil the iron frequently and keep the batter thick. It won't spread on the iron, but you can use a spoon to spread the batter out evenly on the iron. If the batter is too thin, it is much more likely to stick. (See note at end of post from a reader on sticking waffles before making.)
  • To make pancakes, you can use a little more liquid than with waffles (about 2-4 tablespoons more), depending on how thick you prefer your pancakes.
Visit the Daily Dietribe for the tips before making these waffle/pancakes.  I used almond flour and potato starch for my flours.  I also chopped up pecans and added chopped apple and cinnamon.  They were truly yummy!  Make sure you spray with Pam between each waffle cause they tend to stick.

I had two doctors appointments this past month the first being with a dermatologist trying to determine what is going on with my face.  I am having a lot of flushing and red spots on my face and neck.  Haven't taken hormones in months so it isn't hormones and randomly comes on mostly in the evenings.  At first I thought it was due to drinking red wine...only red wine causes it...but twice now I haven't had wine and it has caused a vibrant red flush. I went to the ER before going to the dermatologist because I thought I was having an allergic reaction to something I had eaten and my lips were tingly...what a mistake!  Once again I was treated like a nut case and sent to sit in the waiting room so by the time I got to go the back exam rooms most of the flush had disappeared and had left the rash behind.  I was glad my daughter and friend were with me to let them know exactly how red it had gotten!  The dermatologist said it was probably my roscea and started me on more meds and changed all my face cleansing and moisturizing products.  I look like a broken out, acne blessed teenager today!

I visited Dr. Malik my rheumotologist for a routine exam and took Heather with me cause I was having trouble remembering things and wanted her there to remember what Malik said.  Turns out most my depression and worsened memory issues were due to the medication Lyrica.  I couldn't tell that it was helping my pain so she said to quit taking it slowly.  Doing that now.  Secondly I have been having problems with my hands and them hurting so bad so I had an MRI done and I am waiting to hear what that has to say about the pain.  I really like Dr. Malik and would recommend her as a very caring and sensitive physician that is truly interested in helping her patients get better and to understand what they have happening to them.  I haven't once heard her say that the pain is in my head and she goes out of the way to determine what is going on with you not just your chart!  btw the MRI of my left hand was an interesting experience!  I had to lay on my belly about 45 minutes with my arm extended over my head and restrained in a device to do the exam.  Of course for a person like me I started hurting about 15 minutes after it started and I am still aching and hurting all over today!

I am going to start working in my garden tomorrow.  Here is what it looks like today!  It is a mess but it won't take long to get it cleared up.  I am planning on trying a square foot gardening type garden this year so I will keep you informed how it goes.

Have a great week!

Tuesday, March 11, 2014

Yogurt and other fun stuff!

I love yogurt...not that flavored stuff that they carry at WalMart in the 20 whillion artificial flavors but the good old fashioned plain cultured yogurt.  Thats the big difference between what I like and the other...culture.  The Yoplait, Dannon, Walmart brand etc have very little if any culture and it is sweetened and thickened using gelatin or other agents.   I love Greek Gods plain yogurt.  It has a little tangier taste then most yogurts but it is so thick and yummy I could eat it by the gallons.

I haven't tried any of the flavored versions but I hear that they are really yummy also.  I tried the lower fat version but I really like the full fat version best.  Only problem with this yogurt is the price!  I guess making a full fat, cultured (they say 5 different ones), probiotic healthy yogurt is expensive but almost $5 for a 24 oz container is a bit steep if you ask me.

I used to make all my yogurt back in the hippie days but we would buy live culture from the healthfood store to make it with....That is expensive now days.  I made most of my bread too...another story.  Anyway I got on line and started reading articles about making yogurt and I got so confused that I decided to make it easy on myself and do it the way I used to but borrowing the culture from the Greek Gods yogurt.   It worked...sort of!  I was so pleased with my experiment even if it came out a little thin it tasted and had the tongue appeal of the store bought stuff!  There is so much you can do with a good yogurt.  Here is what I did!

Homemade Yogurt (the easy way!)

1 quart of milk, fat, no fat, minimum fat whatever you like
1/4 c yogurt
2 Tbl dry milk

Preheat oven to 220 degrees.
Make sure all your utensils are sterile clean so your culture stays pure.
  1. Pour milk in jar and heat to just below boiling...allow to cool to 110 degrees before adding the culture.
  2. Put dry milk in stir well.  
  3. Now temper the yogurt to the milk by adding some of the 110 degree milk to it in a bowl and mixing well.  Pour all back into the jar and shake, shake, shake.  
  4. Turn off the oven.  Wrap the jar in a towel and put in the oven.
  5. Leave in the oven for 4-5 hours for the cultures to grow.  The longer it is in there the better it is but make sure the oven stays at about 100-110 degrees the whole time.  I have a warmer drawer on the bottom of my stove that I use to incubate my yogurt.
I ate it with fruit for breakfast! Doesn't that look yummy with the strawberries cut up in it.  I think I will use it in smoothies too until this batch is gone because it is a drinkable yogurt. 
Another use was making a tsatsiki (tzatziki) sauce to use with some left over gyro meat that Chuck brought me home for supper the other night.  We go to a place here in Norman called the Greek House that has a child's plate for $6.50 that has so much food on it I usually have 2-3 meals out of the meat.  OMG! such good food!  Anyway carrying on here...tsatsiki sauce is a creamy dressing made using yogurt, cucumbers, garlic, onion, oil, and vinegar.   I have found that you can't go wrong with these ingredients however you mix them up just don't leave the oil, vinegar, or yogurt out.  My recipe is simple:

Vickie's Tsatsiki Sauce
makes about 2 cups
1 1/2 cups yogurt or sour cream
2 baby cucumbers (about 5-6 ounces)
onion chopped
garlic to taste
2 tbl lemon juice or 1/2 lemon squeezed dry (you can use vinegar too!)
2 tbl oil
salt and pepper to taste

I throw all the above into the food grinder (Cuisinart) and mix it all together for a few seconds.  If you like chunkier veggies then chop them fine and then mix in yogurt.  Its good how ever you to it.  I like it mixed in with fresh veggies as a salad dressing and in the summer on a Greek salad...oh my! 

The white stuff in this picture is the tsatsiki sauce/dressing.  There is a secret here too...the chicken is covered with it and baked....I know it took me a few minutes to get my head wrapped around cooked cucumbers but this turned out so yummy I will be making it again!  Want the recipe?  Okay here it is!

Chicken made with Tsatsiki sauce

Chicken, cut up or boneless/skinless pieces
1 recipe of Tsasiki sauce from above
Curry Powder
Paprika
salt and pepper to taste

sprinkle chicken with curry powder, paprika, salt and pepper to taste.  Drop in a bag and then cover with the tsatsiki sauce.   If you want a little tangier sauce add the other half of lemon left over from above recipe!  Let sit in the refrigerator overnight or as long as you can let it sit...longer the better.  I baked this in in 350 deg oven for 45 minutes but the next time I am going to put it on the grill outside and see how it turns out.  It has a taste quite similar to a tandoori chicken, not as spicy, and I just wanted to keep eating it. 

Hope you give the healthy living recipes a try.  I really enjoyed them myself.  Stay tuned for more about the yogurt because I read on line I could make the yogurt using almond milk so I will be giving that a try and posting my results here.

Thursday, February 6, 2014

I am great how are you?

...I usually respond to peoples questions about how I am rather then responding with the truth.  Sound familiar to you?  Most people really don't care how I feel they are just asking to be polite so I try to be polite too!  I wonder how they would respond if I really answered them truthfully with how I feel?  Let me think on this a second and I will tell you exactly and truthfully how I feel today...

It is after 2 pm (I didn't get to bed till 6 am cause of the pain and brain issues last night) and I just rolled out of bed so my brain is still very foggy and I am having difficulty putting thoughts together.  I am having to type/erase because unlike my iPad this computer doesn't have spell correct and I am not spelling well but to use the iPad causes me problems when I try to post.   Please excuse any typographical errors that spell check doesn't pick up.   How do I feel...my brains very foggy, back hurts from my neck down my spine, arthritis is effecting my joints and the fibro is causing me to feel like I have a horrible achiness all over my body.  My head is hurting a little bit because of the bright lights of the screen and the brilliant light from the outside due to all the snow on the ground.  My mouth is dry and eyes feel scratchy due to the Sjogren's syndrome that is secondary to all the other crap.  My fingers feel like sausages but don't look swollen and my legs and feet are all achey and cramping but I don't want the doctor to know cause I don't want to go up on my meds.   So all in all how to I feel today?  Bitchy and I want to go back to bed even though I haven't been up a half hour.   I don't do pain meds because they don't work for me so I try alternative things to make it better...that and doing the mind over matter thing!

If I am feeling like that why am I typing this up and why don't I just go back to bed.  Well the answer is I am trying to have a life truth be told.  In about 2 1/2 - 3 hours I will be better.  Brain less foggy and body might even ache a little less and I might be able to venture out into the world.  I used to be out and about every day but now days I probably average 1-2 times a week going anywhere.  I can't handle loud noises, bright lights, or crowds very well anymore so I grocery shop in the middle of the night.  I go with my daughter and we shop a little, visit the book store or Starbuck's for coffee and I go to her house to craft and paint.  I lead a much different life then I did before the Fibro, CFS, and gluten issues took hold of my body.

I had 4 doctors appointments in January and I haven't the foggiest how much money was spent on x-rays, MRI, and blood tests.  I was told again that my orthopedic doctor doesn't believe in Fibro and that it is just a catch all for all the gripes about aches and pains...yes I will keep going to him because what he lacks in bedside manner he excels in diagnosis and treatment.  My rheumatologist told me that she now thinks I am truly a fibro victim (good word that) because she can see I am not faking symptoms but she can't find any medical basis for them but because I am on Medicare with BC+BS insurance they won't pay for any blood or radiography tests to prove it.  I get SSDI and I am sure to hell not in the market to pay for $800 - $1000 test to prove I have it  when the treatment wouldn't be any different if I had a positive test result.  $1000 is almost as much as I make each month and I am having problems just getting by as it is.   The bright side is I only have 2 doctors to visit this month and they are just follow ups to all the lab and stuff I am having done.  Joy!

                                                           FighterZine
I was nominated for a blog award and normally don't accept them but I figure that this blog has a lot of good information for me and others like me.  The blog is called "Fibro Fighterz" and has an online magazine called Fighterzine!  They are also on FaceBook trying to get the message out that those of us with Fibro are not alone.  Thank you Fibro Fighterz!  Now you guys go check it out!

On the bright side...Here is a recipe that I thought that I would share for my gluten free followers.  btw is they ask you at a restaurant if the gluten free is due to diet change or medical issues always say medical because they use different ways to process and cook the food to prevent gluten contamination.   These cookies are more then Yummy!  I would give them a 10 star in a 5 star rating system!


Gluten Free Homemade Nutter Butters
Prep Time: 15 minutes
Cook Time: 15 minutes
Total Time: 30 minutes
Yield: 10 -15 cookies depending on how thin/thick you make them.
Way better than store bought!
Ingredients

For the cookie:
  •  2 cups oat flour (gluten free all purpose or almond flour would work as well)
  • 1 cup + 2 T peanut butter
  • 1/2 cup coconut sugar
  • 2 T coconut oil
  • 1 tsp vanilla extract
  • 2 T milk (I used almond milk) You can add a bit more milk if the batter looks dry.1
  • 1 egg (I used a flax egg replacement)

For the filling:

  •  1 cup peanut butter
  • 1/4 cup maple syrup
  • 2 T coconut oil
Instructions
  • Preheat the oven to 350.
  • Mix all the dry ingredients in a bowl.
  • In a saucepan, combine the peanut butter, flax egg, coconut oil, vanilla and milk.
  • Cook on medium heat until everything is well combined and the peanut butter is soft.
  • Set aside to cool down to lukewarm.
  • Once the peanut butter mixture is cooled, add it to the dry ingredients and mix until combined.
  • Form the dough into thin, long logs and place them onto a lined baking sheet. (see photo above for step by step instructions)
  • Use a fork to make the impressions on the cookies.
  • Use your fingers to push the sides of each cookie in at the center to shape them like nutter butters.
  • Bake them in the oven for about 15 minutes.
  • While the cookies are baking, add all the filling ingredients to a blender.
  • Mix until smooth.
  • Frost the cookies and form sandwiches after the cookies have completely cooled.
My cookies came out pretty thick. When I make these again, I will thin the amount of dough out that I use. I also initially added 1/2 tsp baking powder to the dry ingredients and I felt the cookies rose too much. That is why I left it out of the recipe.
If you want to cut the calories and sugar a bit, you can just fill the cookies with plain peanut butter instead of mixing up the sweet filling.

Tuesday, January 28, 2014

Vitamin D deficiency

Just read an article on Web MD's Fibromyalgia Center about research being done on Vitamin D and pain associated with Fibromyalgia.  In the article a  Dr. Florian Wepner, of the Orthopedic Hospital Vienna Speising, ran a study to determine if there was a connection between low Vit D levels in people and pain.

The Research paper published in the journal PAIN but after trying to find it to read I found out it would cost me $31.50 for a copy...Suffice it to say on my disability I can't afford to buy the pub.  The gist of the article is it was a randomized placebo study where some patients were given placebo and others were given Vit D.   Researchers said those who took supplements reported less pain and morning fatigue over time than those who did not receive the supplements.  "[Vitamin D] may be regarded as a relatively safe and economical treatment and an extremely cost-effective alternative or adjunct to expensive pharmacological treatment," Wepner said in a journal news release.  If you would like to read the abstract of the article go here.

I have had experience with this issue in my Fibro travels.  In 2011 I had such an increase in pain and fatigue that I went to a rheumatologist hoping that I would get a quick fix diagnosis and all my "fibro crap" would go away because you see I had never really accepted the fact I had fibro.  I still thought that I was being miss diagnosed and they hadn't really found what was wrong with me because Fibro was a catch all for those they didn't know what was wrong or those people seeking drugs. 

This rheumatologist ran several thousand dollars worth of tests on me ...xrays, lab, MRI, etc. etc., and nothing showed up exceptionally low levels of Vitamin D and my liver test showed almost Hepatitis levels of toxicity.  I was given orders to quit the Ibuprofen 800mg that I had been taking 4 times a day for over 10 years and to start on Vitamin D 50,000 IU weekly for 8 weeks.  I then started taking 5,000 IU Daily after that.  I really did start to feeling better after about 3 months of taking the drug.  It cost me about $5 a month for the Vitamin D and the pain relief we better then when I was taking Ibuprofen.  BTW for me coming off the Ibuprofen wasn't fun.  I had all sorts of weird pains and really had problems with getting comfortable when I tried to sleep.  I would contact a doctor before trying the Vitamin D and get your levels checked.  If you are out side in the sun a lot you probably are manufacturing enough but get checked anyway.

I saw my rheumatologist last week and my levels of Vitamin D were within the normal ranges and my liver tests were better.  I am going to continue to taking the Vit D as I have been cause it seems to be working for me.  I am curious to see how this will impact the medical community as a whole because big drug companies aren't going to like it that a little vitamin might do better then their drugs.  It will be interesting to watch the story unfold!

Monday, December 30, 2013

Gluten free Chili

That just sounds weird to me because I would have assumed that by nature Chili would be gluten free but not all chili's are so I now make all my own chili, taco, and gravy mixes so I don't have to worry about looking at the labels to see if they have added flour to the powders. 
This was my dinner the other night that spurred the writing of all these blog posts.  The hamburger is a patty I buy at Sprouts for Chuck that is hamburger, jalapeno, and cheese and tonight I put mushrooms and pepper jack cheese on it on my home made gluten free bun.  I love crackers with chili but I have yet to find a gluten free cracker that holds a candle to the saltines I grew up with so I usually eat gluten free tortilla chips!

I had decided to make the bread machine gluten free bread and that led to the gluten free hamburger buns and as I was mixing those up Chuck came in the kitchen wanting to know if I would make chili for supper.  It is a routine evening when I ask Chuck if he has any ideas of what he would like for supper and the standard answer usually is something along the lines of..."what ever you want to fix I will eat" so it was a surprise when he approached me with the chili idea! 

I have been making this chili forever and it has not varied much from the first time I made it just after we got married.  If there ever was a recipe I followed I don't remember I just remember throwing stuff in the pot till it was what I wanted.  My kids have asked me a number of times for the recipe but I usually forget so hopefully they will look at the blog and get the recipe...if not I can always point them in this direction.

Vickie's Chili
  • 1 onion chopped coarsely
  • 2 lb ground beef
  • 1 can diced tomatoes
  • 1 can Rotel Tomatoes
  • 1 can chopped green chili's
  • 3 cans of chili beans
  • 8 Tbls Chili seasoning (recipe below)
  1. Brown the onion and beef in a large pan.
  2. Add rest of ingredients and heat to just boiling.  
  3. Turn down the heat and let simmer about 30 minutes or put in crock pot for later.
The Chili/taco seasoning recipe I looked up on the Internet when I became gluten intolerant and it has turned out to be just as good as the Williams Chili Seasoning I have used for years.  btw Williams doesn't say on it's package it has gluten in it but I have gotten so used to using this I quit buying Williams.

Homemade Taco Seasoning {large batch}

Ingredients:
½ cup plus 2 tablespoons chili powder
2.5 teaspoons garlic powder
2.5 teaspoons onion powder
2.5 teaspoons red pepper flakes
2.5 teaspoons oregano
2.5 teaspoons paprika
¼ cup plus 1 tablespoon cumin
¼ cup salt (more to taste)
¼ cup finely ground pepper

Instructions
1. In small bowl, mix all ingredients and store in airtight container. (Or you can mix it together in
the container you are going to store it in–just give it a shake.)

2. Add 2 to 3 tablespoons of this mixture plus 1/2 cup of water to one pound of cooked meat (of
your choice). Simmer over medium heat, stirring frequently until there is very little liquid left in
the pan.
http://www.rachelcooks.com/2013/03/25/homemade-taco-seasoning-large-batch/

Hamburger buns

As promised here is the post for the hamburger buns I made yesterday.  I bought some special pie pans at WalMart in their Christmas stuff this year that are suppose to be for making individual pies but I decided they were priced right and I could use them to make my hamburger buns.  Doing gluten free bread baking is a challenge because the dough is not really a dough but a very stiff batter and you need to contain the dough in a pan or form of some sort.  The recipe for this bread batter is very similar to the one yesterday but I used a Kitchen Aide mixer to mix up the batter and then scooped it out into the pan forming it into the shape of a ball and pressing it down gently.

Done buns!


These pans have 4 wells just about the size of a hamburger bun and I was happy when I saw them because I haven't been able to find a pans that are specifically for hamburger bun making.  My buns came out a little flat because I tried getting 12 buns out of the recipe instead of just 8...looked like a lot of dough there to me!  Anyway next time I will make just 8!  They are fine crumb, crust is crunchy cause you use an egg wash to keep the sesame seeds on!


Here's the hamburger bun recipe!


Hamburger Buns,
gluten free of course!!

  • 2 large eggs beat well
  • 16 oz. lukewarm water, 90°F
  • 4 tbsp. melted butter or canola oil (do not use margarine)
  • 1 tsp. cider vinegar
  • 3 cups Bob’s Red Mill all purpose baking flour
  • ½ c sweet rice flour
  • ½ c rice flour
  • ½ cup tapioca flour
  • cup non-fat dry milk
  • 3 tbsp. sugar
  • ¼ c honey
  • 1 tbsp. zanthan gum
  • 1 ½ tsp. salt
  • 1 tbsp baking powder
  • 2 tbsp. active dry yeast
  • Sesame seeds 
1.     Proof yeast by taking 8 oz water and sugar and put yeast in it and let set 10 minutes.
2.     Take second 8 oz warm water and add eggs, honey, butter, cider vinegar
3.     In the mixer bowl put the flours, milk, baking powder, zanthan gum, and Salt.  Put mixing bowl on mixer stand and using wire whisk attachment (I have a Kitchen Aide Mixer)  mix flours mixture together well. 
4.     Start adding liquids to flour and blend together until well mixed…about 4 minutes.  The mixture will be more of a thick batter then a bread dough. 
5.     I used welled baking pans to form my dough into rolls…actually a Wilton individual 4-pie pan but I understand you can find regular pans that are used to make hamburger rolls but I have never seen them around here.  I used to make them just by forming my bread dough into round balls and smashing them down but this dough is too thin to do that with so I scooped up about 2/3 cup of dough and put it in the well of the pan and patted it down with well oiled hands.
6.     Once the dough is in the pan I let it rise about 20 minutes then I made an egg wash and brushed it on each roll and sprinkled the roll with sesame seeds.  Let rise additional 25 minutes cause the all purpose flour tends to need a little longer then the rice flours to rise.
7.     Bake in preheated 350 degree oven for 20 minutes and test doneness by tapping on top of roll.  It is done if it sounds hollow. 

I adapted this recipe from another bread recipe and I probably will be doing some tweaking to make the rolls a little lighter but they will do…very tasty!

Okay that's it for this post today.  I will publish the chili recipe tomorrow!  


Sunday, December 29, 2013

Bread making and other culinary pursuits!!

I decided that I wanted to try my hand using the bread machine to make bread today.  I bought this machine about 6 months ago but haven't done much with it but times they be a changin'.  I went to the store the other day and a loaf of good gluten free bread was $8....errrrr...I don't make enough on my disability to eat that costly of a bread so I decided to try to give it another try. btw if you want good bread go to Jason's Deli and buy their gluten free bread because a loaf twice the size of the $8 loaf only costs you $11 and it is much better tasting.  A loaf lasts me almost a month.

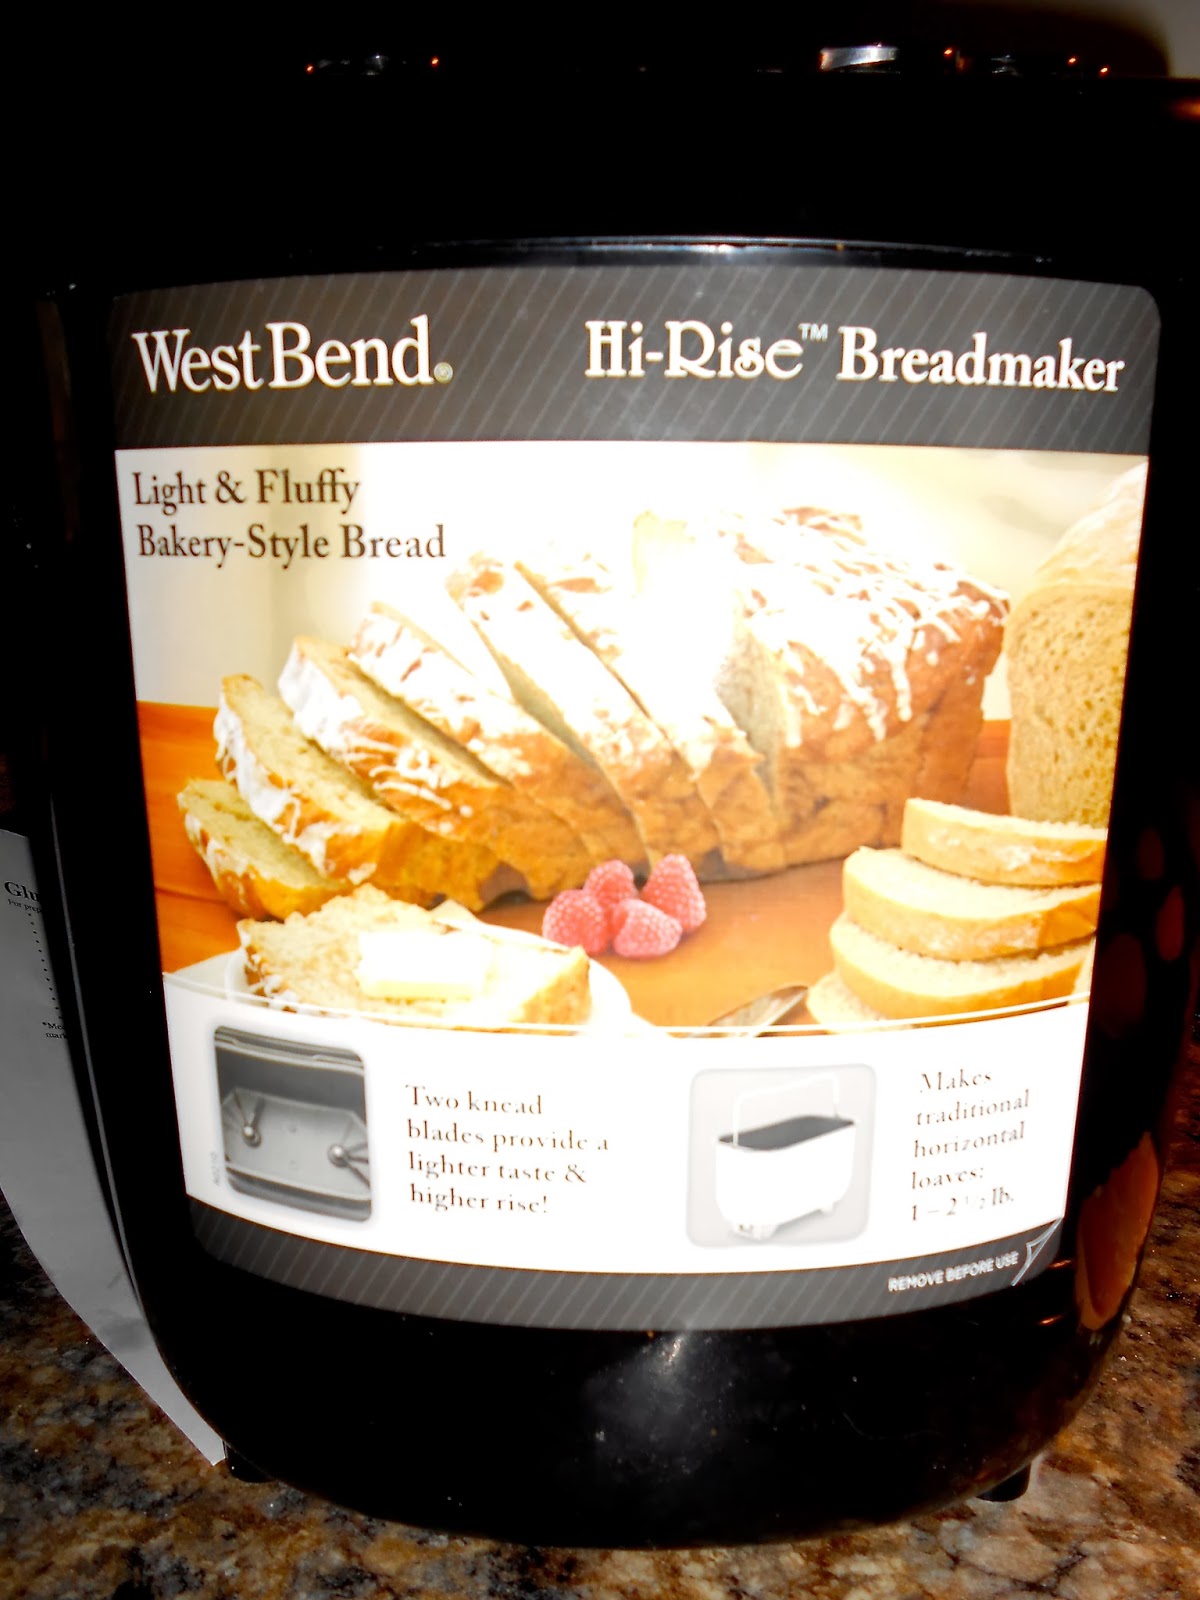
The bread machine is put out by WestBend and when I bought it off of Amazon the description said it has a specific gluten free setting but when it came and I looked at the book it was primarily just a basic bread setting.  The first loaf I made with the machine was such a fiasco I got on the line and chewed on Amazon for awhile and they turned me over to the people who actually sold me that machine...no good there either cause if I can't read then it isn't their problem.  Well that's more or less what she said!!!

Anyway here is the bread maker

of course you can't expect the same hi-rise with gluten free bread as you get with gluten bread but I was hoping it would be higher then some of the breads I have made in the past.
 Here is a picture of the uncooked bread.  This machine has two beater blades and it seems to stir the ingredients equally.


I wasn't real happy with the way the bread baked because it seemed to be over baked and when I cut into the loaf it was actually browner on one end then the other and whereas it didn't taste 'burned' it looked over done.  The crust was a little chewy but overall the bread was tasty!
Bread is a little brown and crusty!


The bread when sliced shows a good 'bready' look and crumb.  I still have issues getting over the eggy texture almost all gluten free bread has.  I guess it is a choice between adding the egg or having a heavy dry loaf of bread.  I will eventually get used to the egg!

Here is the recipe!


Gluten-Free Bread, 2 lb. 
Adapted from the WestBend Bread maker recipe
For preparation in a bread maker with traditional shaped, horizontal bread pan.

  • 3 large eggs beat well
  • 16 oz. lukewarm water, 90°F (1 cup + 2 tbsp.)
  • 4 tbsp. melted butter or canola oil (do not use margarine)
  • 1 tsp. cider vinegar
  • 2 cups white rice flour
  • ½ c sweet rice flour
  • ¾ cup potato starch flour
  • ½ cup tapioca flour
  • cup non-fat dry milk
  • 3 tbsp. sugar
  • ¼ c honey
  • 1 tbsp. zanthan gum
  • 1 ½ tsp. salt
  • 1 tbsp baking powder
  • 2 tbsp. active dry yeastProof yeast by taking 8 oz water and sugar and put yeast in it and let set 10 minutes.  
    Update:  a friend just told me that you don't proof yeast in a bread machine you just throw it in and it does the rest...okay next time I will try that and see what the difference is.  Think I will fiddle with some of the settings too!
  1. In mixing bowl thoroughly combine eggs,  8 oz lukewarm water, melted butter or oil and cider vinegar with a wire whisk or fork. Pour mixture into bread pan.
  2. Measure and blend together all dry ingredients, except yeast, with a whisk or fork. Place into bread pan on top of liquid ingredients. Add yeast mixture. on top of dry ingredients. Lock pan into bread maker.
  3. Program for Basic, Basic Rapid, or Basic Specialty bread setting, 1 ½ lb load size and Medium crust color. Press Start/Stop button to turn on. When mixing action begins, use a rubber scraper to assist in mixing for a few minutes. The machine will then mix the thick batter by itself. The mixture will not form into a ball of dough, but will be a thick batter that will take on a swirled appearance on surface after about 10 minutes of mixing. After mixing, the bread will go through the rise cycles and bake.
  4. When the bread is done, remove bread pan using oven mitts. Invert pan to remove loaf and cool completely on rack before slicing. This recipe makes about a 2 lb loaf of bread that will be about 5 inches high.
I also made gluten free hamburger buns and homemade gluten free chili today but I think this is enough for one blog post.  Stay tuned they will be posted soon!